For those of you who don’t know me, I’m a designer by trade, do mechanical work and light restorations on the side, and have blogged elsewhere. From time to time I come across some novelties, things I discover or really cool tips that can make a positive difference for more than one kind of car, and for other people as well. This is one of them…
Craving an older dirt-cheap convertible this summer, I had my choice of Sebring or perhaps a Sebring. You can probably guess what I bought. Yes it’s not the most stellar model to roll off the assembly line, it has its quirks and shortcomings but on the whole I have no regrets, keeping in mind I will sell it in the springtime, the next scheduled sale in an ongoing list of cars, that is my life.
Continue reading after the jump!
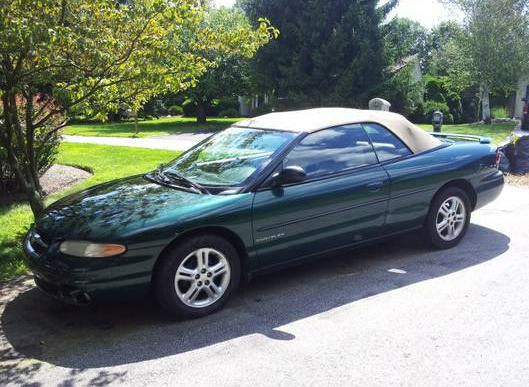
The car was in good condition and the owner, who wasn’t poor lavished some very adequate repairs to keep it on the road for 250,000 miles. The car needed rear brake lines, engine mounts and a couple other minor things.
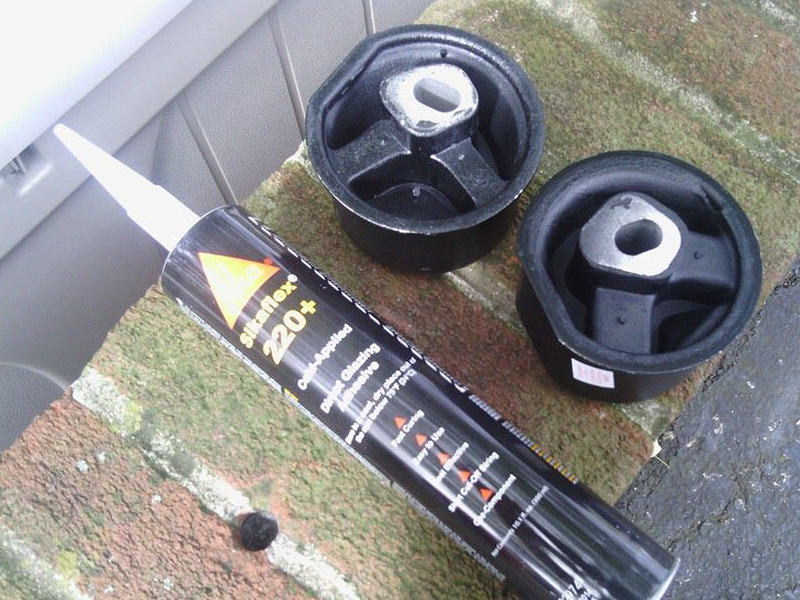
One shortcoming with the 1996 and similar Sebrings are the front and rear engine or roll mounts. These are bushing-type urethane mounts and they have more air in them than urethane. Air is no good at restraining an engine, and the more there is the less urethane there would be to do the job. The result is people complaining about replacing them all too often.
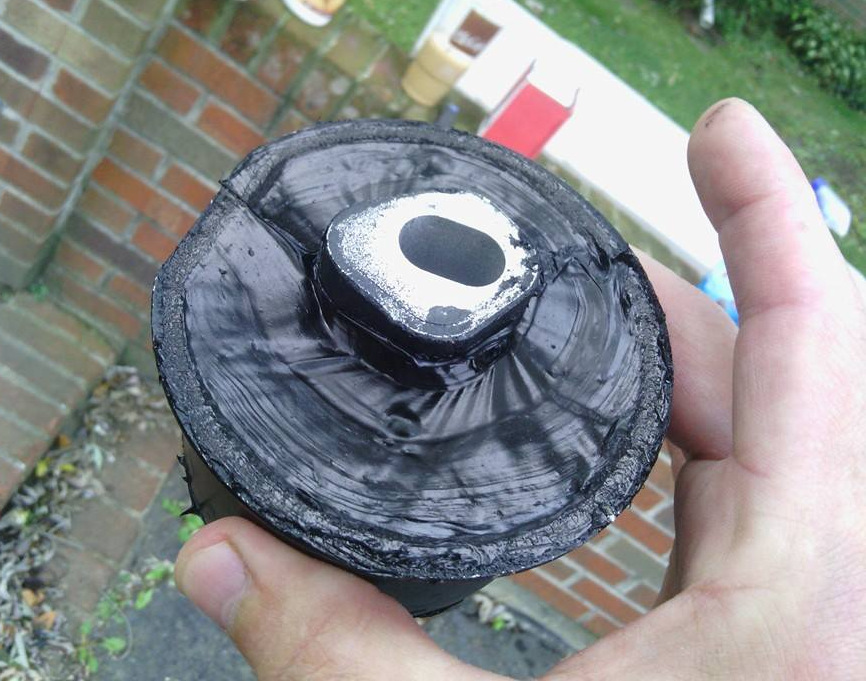
Enter Sikaflex 220+, basically it’s a urethane adhesive used for windshield installation. When you buy replacement mounts, clean them thoroughly to remove any residue. If the recesses are deep, you may want to fill them half way, allowing the urethane to set completely, then finish them off, troweling a flat surface as if you were icing a cake.
The result is one serious mount, and it erases whatever stupidity that originally weakened the design. I hope this helps someone out there… Knowledge not shared is wasted on one person.